
| The Underlands Troglodytes | Guides: Desert terrain making |
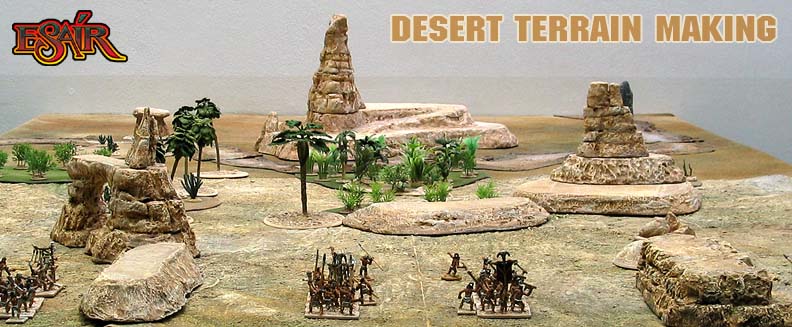
Building the UnderlandsWhen thinking of a "desert" it is easy to fall into the sandy stereotype trap, but most desert areas are actually solid rocky ground, with sparse vegetation. The Underlands are no exception. Near the centre and coastlines there are large areas of sand, the "dune sea", but most of the land that is worth fighting for is arid with a solid stony surface. In this guide we will look at how to build scenic models of all the terrain features typical of the Underlands. In this first part we will look at stone formations, large plants and hills. In the second part we will cover brushy and rocky ground, terrain mats, dry rivers and water pools. As always your input is very important to us, soMany thanks to Steve for his precious help in writing this article! |
See also our Trog painting guide:
Painting Trogs is a step-by-step method to paint quickly and effectively a large Trog host, so as to field a great looking army in the shortest possible time! |
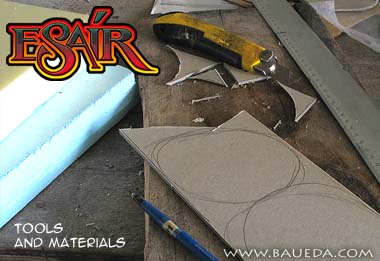
Step 1 - Tools, materials and the right place to work!The first thing you need to do, even before you start, is to gather all the necessary materials, tools and equipment, and even more importantly find a suitable place to work. Read through the whole article before starting and make a note of what you need. Keep in mind this work will make a mess, if you don't have a place already set-up as a workshop you'll need at least a large chopping board! You'll also need somewhere, well ventilated or outside, to leave your pieces to dry overnight between the many steps. Last but probably most important of all, a word of warning: the activities described in this article are all potentially dangerous, and most material and tools used are hazardous. Without taking necessary precautions you can seriously harm yourself or at the very least destroy the place you're working in! Wear suitable protective clothing, follow all precautions and advice given here and on the products you will use, and if you are not an adult, only attempt this under close adult supervision. We decline any responsibility whatsoever for what happens if you don't! |
|
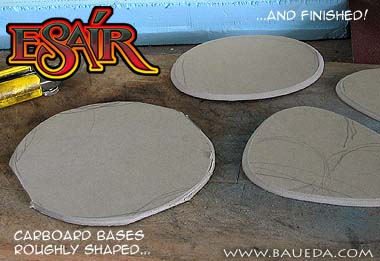
Step 2 - binder board basesNow let's begin with the actual job! For all the smaller terrain pieces, like individual palm trees, rocks and water pools, you'll need a rigid base to mount them on. This has several advantages, it delimits the exact area represented by the pieces, makes them stable and easy to position on the table, and also helps in protecting them when storing or moving them around! Find a piece of strong mounting board, or if you prefer you can use a more rigid material such as 1/8" hardboard, Masonite, vinyl floor tile, etc. Draw the shape and size you want the final piece to be, then roughly shape it with an xacto blade or a similar cutter. Try to keep the blade at an angle sloping outwards, and ALWAYS CUT AWAY from your body. ALWAYS keep your fingers well away from the path of the blade, it's easy enough to get involved in the work and forget about it... until is too late! Once the piece is roughly shaped finish it off with sandpaper. Use a coarse grade first to round it up, then smooth the edges with a finer one. This may produce dust which can be harmful, avoid breathing it at all times. |
|
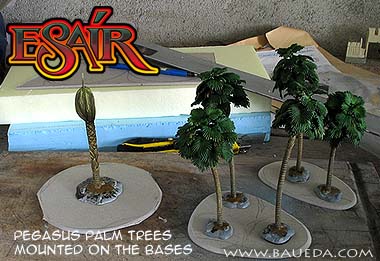
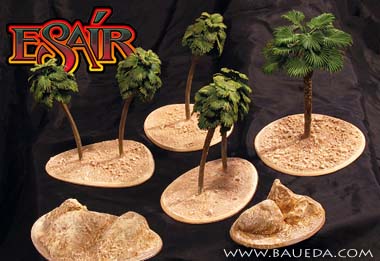
Step 3 - mounting the piecesThere is a wealth of suitable terrain pieces on the market; we sell some ourselves. The palms we have used here are made by Pegasus, there is a very nice article on how to base them in detail here: pegasus palmsYou can also buy suitable desert plant models in many toy shops and some are included in plastic soldiers boxes, like IMEX Alamo Accessories. More suitable bits and pieces can come from the most unlikely places, aquarium stores for example are a great source of scenery material! You can easily make yourself some rocks and boulders using the same instructions on making hills that follows later in this article. Once you have your piece painted and securely attached to the cardboard base (two part epoxy glue is best for this) cover the entire top of the base with thick PVA (white glue or Elmer's glue) and flock generously with your favourite sandy flock. Leave to dry at least 24 hours, then coat with a watered down solution of PVA, to secure any flock and sand to the base. For painting the bases see the instructions for the hills below. |
|
Step 4 - First piecesAt this point you should have got yourself a nice little assortment of scenery. We suggest you to use these to mark impassable terrain, or special areas to be used as game objectives, buildings and other terrain elements that give cover and break line of sight. For areas of difficult terrain, like rocky or brushy ground or similar, we have found that the best compromise between visual appeal and ease of use are small terrain mats with separate markers on the top. The terrain mat is made of cloth and painted according to the area that it is meant to represent. It lays nice and flat on the table and gives a precise and reliable reference for playing. The separate individual markers provide an attractive element of visual interest and also clearly indicate what kind of area the mat refers to. They can easily be moved aside when figures enter the terrain, and stored separately. We will look at these in more detail in the second part of this guide! |
|
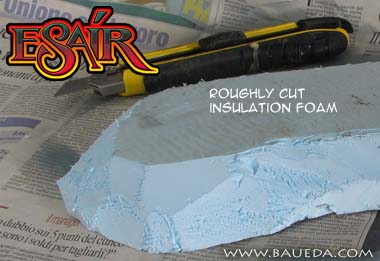
Step 5 - Hills and desert rock formationsNow is time to look at the main technique we will use to actually build the rock formations! The basic material is foam insulation board, this is an expanded polystyrene foam board that can be found in any building supply store. It comes in several colours (pink, blue and yellow are common) and different thickness. Grab as many different ones as you can, variety helps realism! Use a cutter with a long blade or a sharp knife to roughly shape the pieces. We have found that the best assortment is given by three basic shapes: large flat pieces, medium size rounded ones and small vertical rock formations. These can be layered on top of each other or used separately and combine ease of construction with flexibility of use, allowing many different combinations! |
|
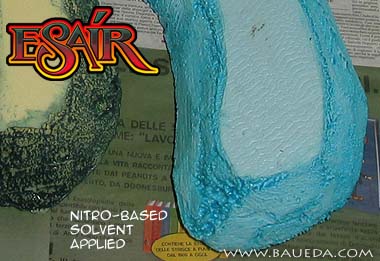
Step 6 - Wash on the weatheringNatural rock formations such as those that can be found in the desert have a characteristic scorched appearance, given by centuries of exposure to atmospheric agents and the erosive effect of sand carried by desert winds. To simulate this quickly and effectively there is a fantastic method, but as with all things it has a down side. The method itself is extremely simple, just paint over the surface of the foam with a Lacquer Thinner, or any Acetone based solvent. This is available in any home decoration store and is a common but rather noxious paint thinner and brush cleaner. Use a cheap brush and keep it almost dry, and gently but quickly wet the entire surface you want to weather. Avoid the top of the board to leave a flat surface to play on. The solvent will eat into the foam, partially melting the surface and imitating the natural erosion process. It will also leave a much harder and resistent surface. The only problem is that the fumes that are created could be extremely toxic, so you MUST do this outdoors, and use a fan to blow the air away from you, so as to completely avoid breathing the fumes. You shouldn't do this alone and never ever indoors!! Lacquer thinner fumes are extremely dangerous to your health, and could ignite easily with catastrophic results, so use extreme precaution and avoid smoking! |
|
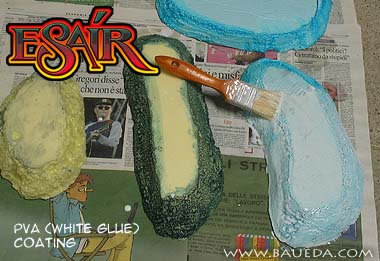
Step 7 - Preparation for paintingOnce you have left the treated foam pieces outside overnight they'll be stabilized and safe to handle. The melting caused by the solvent will leave the surface of the foam board much harder and resilient, but still nearly impossible to paint on. What you need to do now is prepare the surface so that it can be painted easily, by applying a coating such as PVA, acrylic, silicone or rubberized paint. We used thick PVA, it's cheap, safe, works a treat and it's very useful for a number of other things, so it's often already on hand. Don't add any water or the glue will run away on the plastic surface. If you like you can scatter a little fine sand flocking to the top flat part to get a nice textured finish. The PVA coat, thick as it needs to be will also further strengthen the foam surface, but will take at least 24 hours to dry completely, possibly much longer in cold, damp conditions, so set the pieces aside and work on something else for a while! |
|
Step 8 - Base coat and dark washAll that is left to do now is to paint them up! You can refer to the Painting Trogs guide for a more detailed description of a quick and effective painting method. Basically all you need is a base coat, a dark wash and a couple of drybrush passes to get a great looking piece! Acrylic colours are the best for this job, but don't waste money buying expensive "model" colours. Go to your local Home Improvement store and look for tins of acrylic based paint. They're actually tougher than model colours, come in a variety of shades and are much cheaper by comparison! Choose carefully the base coat colour, it's best if you can get a relatively large tin of it and use it for all your pieces, including; the cardboard bases, the hills and even the terrain mat. This will give a degree of consistency to all your desert terrain. Pick a light brown colour, don't worry if it's not exactly the right shade you'd like, the final effect will be very different from the base coat anyway. Just as with figures, you also need to do a dark wash to simulate shadows. As always with washes the most important thing is to make sure the base coats are thoroughly dry. A good all-round colour for washes is "Raw Umber", but for ours we have used a lighter colour, "Raw Sienna". |
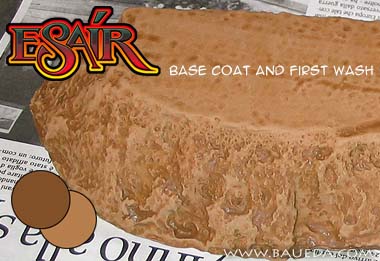
|
Step 9 - DrybrushingNow it is time to pick up the details using a lighter shade of the base colour. The piece you see here is highlighted using 50:50 Naples Yellow and Yellow Ochre mixed. You should cover around half of the piece at this stage, but don't try to do it all in a single pass or the colour will run and pool which is exactly the opposite of what you want! Keep the brush dry, do a single pass on all pieces and come back for a second pass once they have dried. If two are not enough do another, until basically all but the recesses have got at least a little lightening. If you want to go esoteric you could also use slightly different shades of colour... paint bands of alternate shades, made by adding a very little bit of red ochre, grey or white to the base colour. |
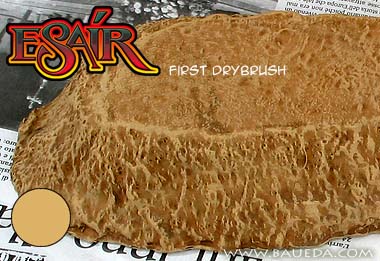
|
Step 10 - Finishing touchesNearly there! Now we only need to pick up a few details using an even lighter shade of the colour we have applied in Step 9. We have also further highlighted the top surface and some details of the larger pieces with Yellow Ochre and White mixed with just a little of the Raw Sienna used for the base coat. Once you have finished painting your scenery make sure all that work doesn't get scratched the first time you use it: give all the pieces a good protective coat using any of the large number of suitable products on the market. For extra protection you can give them a coat of spray gloss varnish (the toughest) and once this is dry a couple of coats of matt varnish to eliminate the shine. |
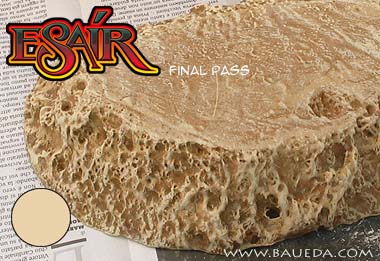
|
Step 11 - Complex shapesWell that's it. All your hills are finished and looking good. All that is left to do now is play with them! If you have followed our advice you should have a nice set that can be combined in several different ways. If you have enjoyed yourself and feel ready for something a bit more adventurous you can glue together several layers of foam (use the bits left over from the larger pieces!) and carve them into the shapes typical to deserts, like pillars, arches and mushroom formations. Once you have roughly cut the blocks to shape, you can use a blunt wooden or metal tool, like a spoon handle, to press ridges and cracks into the foam before applying the solvent. You can also use this technique to make very large scenery like a canyon or even great looking asteroids for a space game. Your imagination is the limit!Thank you for reading this far and have fun with Esair! |
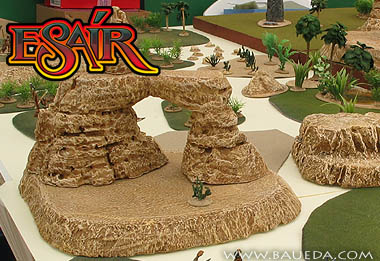
|
|
More guides coming soon:
Back to homepage |